Changing the pickup roller
Normal use with good media causes wear. The use of poor media might require more
frequent replacement of the pickup roller.
If the printer regularly mispicks (no media feeds through), you might need to change or clean
the pickup roller. See
Ordering supplies and accessories
to order a new pickup roller.
CAUTION
Failure to complete this procedure might damage the printer.
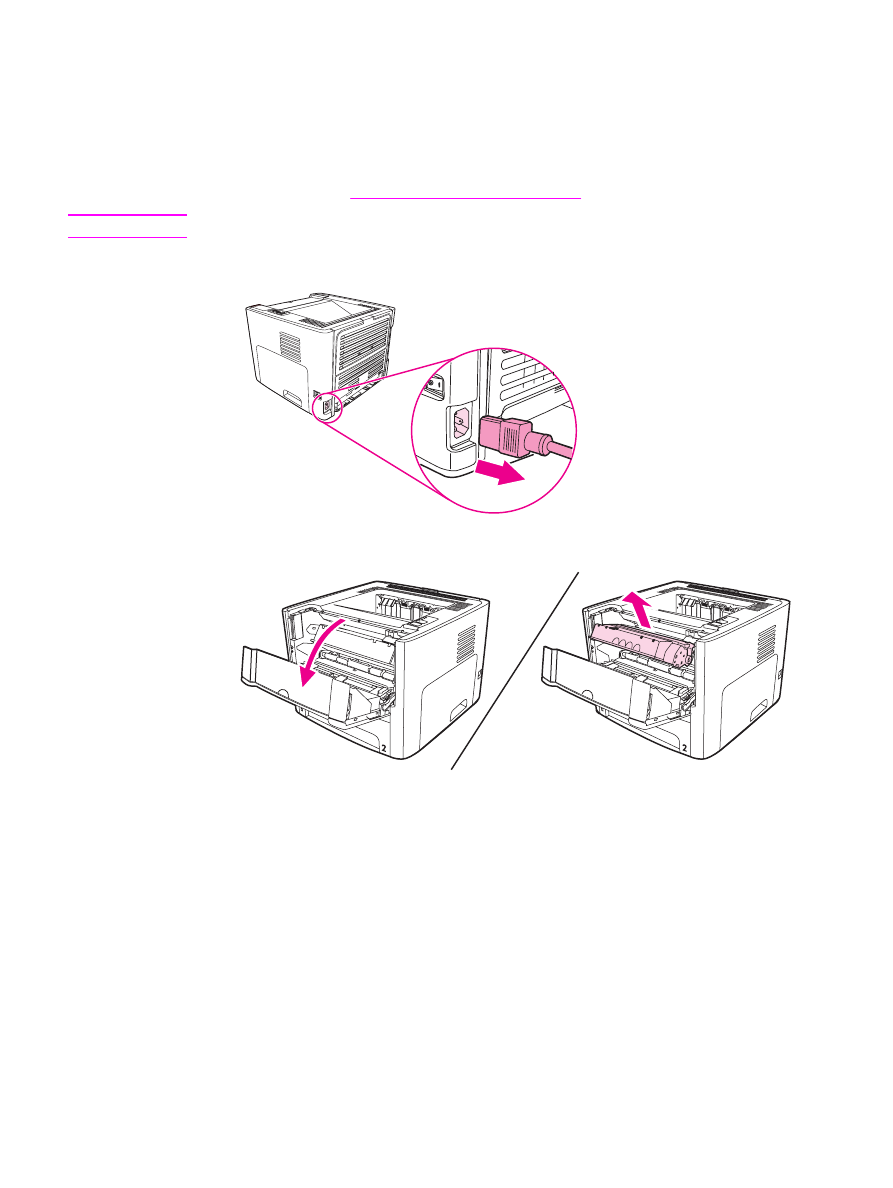
1. Unplug the power cord from the printer, and allow the printer to cool.
2. Open the print cartridge door, and remove the print cartridge.
ENWW
Changing the pickup roller
73
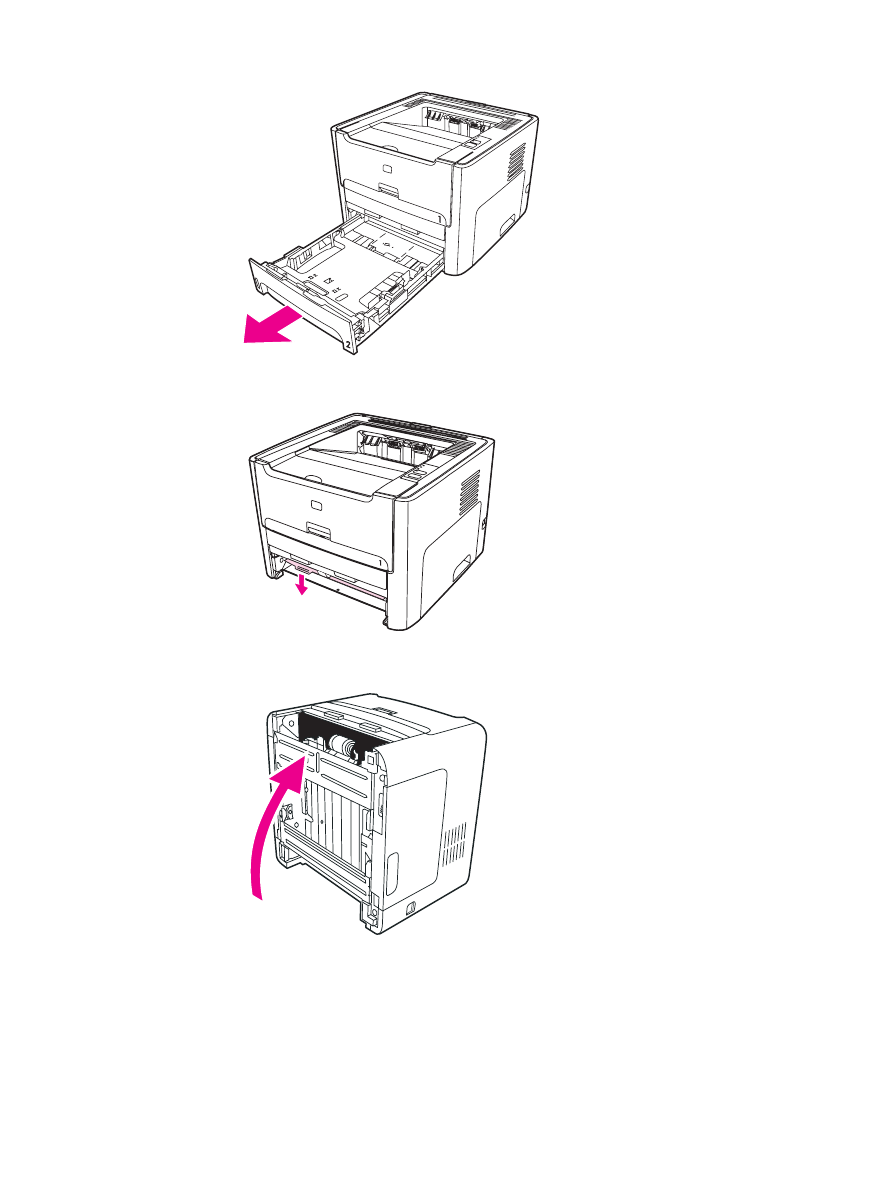
3. Remove the main input tray (Tray 2).
4. Open the front automatic two-sided path door (HP LaserJet 1320 series printer only).
5. Place the printer on the work surface with the front of the printer facing up.
74
Chapter 5 Maintenance
ENWW
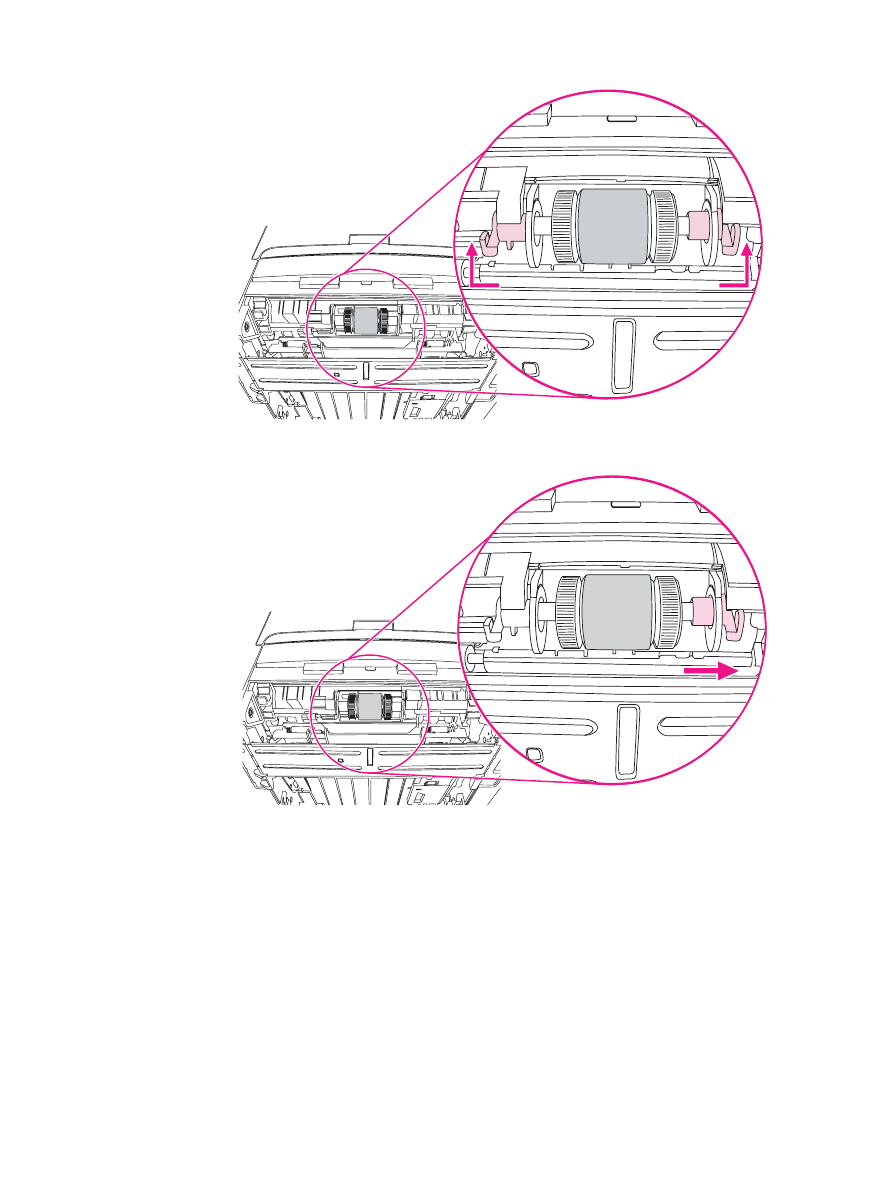
6. Pull the white tabs outward, and rotate the tabs up.
7. Slide the right tab to the right, and leave the tab in this position throughout the procedure.
ENWW
Changing the pickup roller
75
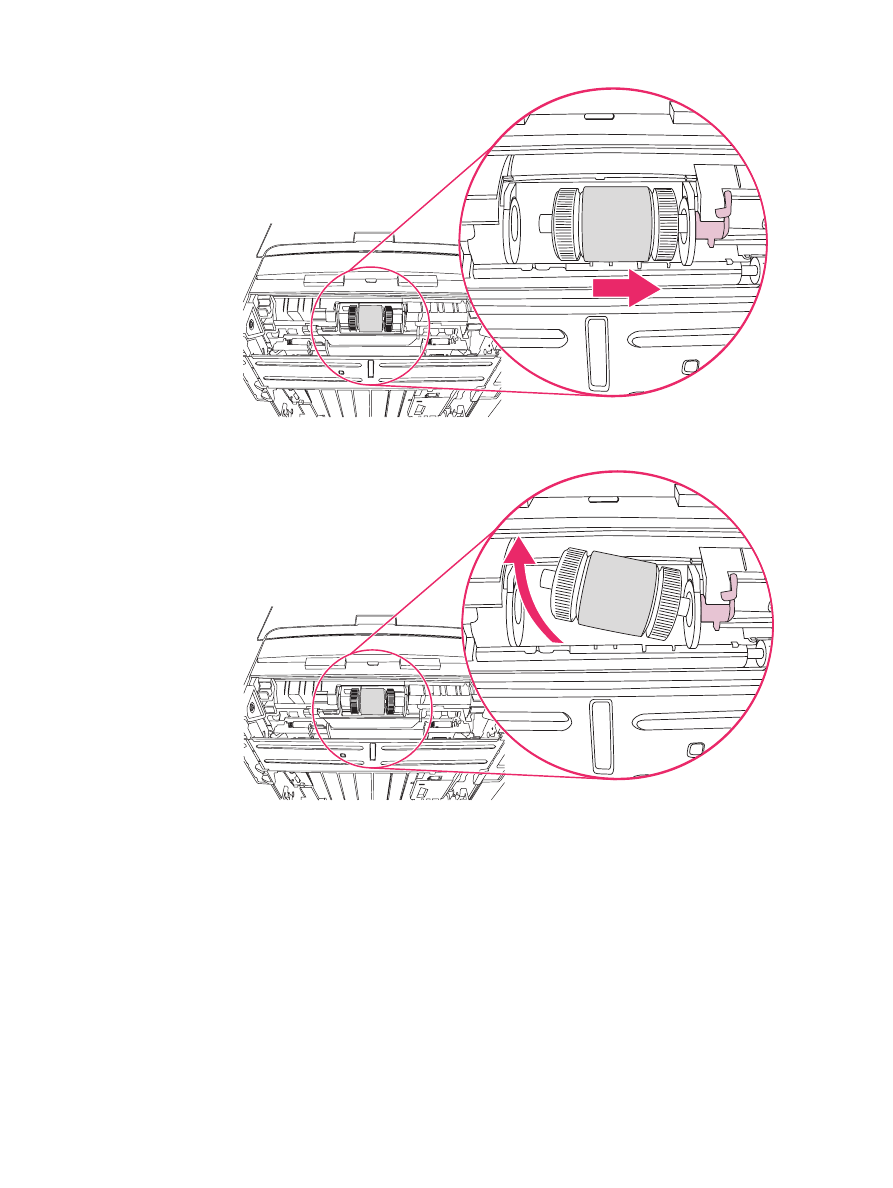
8. Slide the pickup roller assembly to the right, and remove the left end cap.
9. Remove the pickup roller.
76
Chapter 5 Maintenance
ENWW
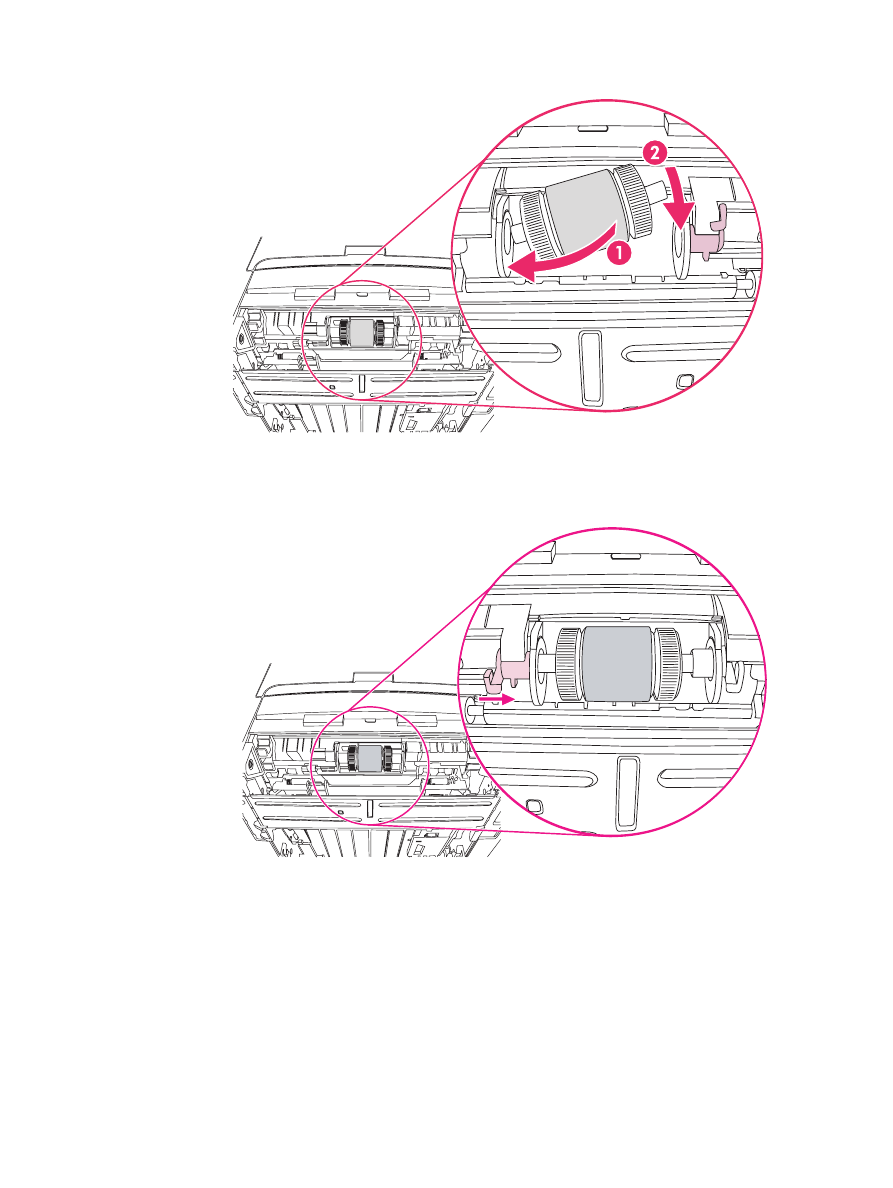
10. Insert the left side of the new pickup roller into the left slot (1), and insert the right side
(with notches in the shaft) into the right slot (2).
11. Rotate the shaft until the notches engage and the shaft clicks into place.
12. Place the end cap over the shaft on the left side, push the end cap to the right, and
rotate the tab downward into position.
13. Push the right tab to the left, and rotate the tab downward into position.
14. Place the printer on the work surface with the top of the printer facing up.
ENWW
Changing the pickup roller
77
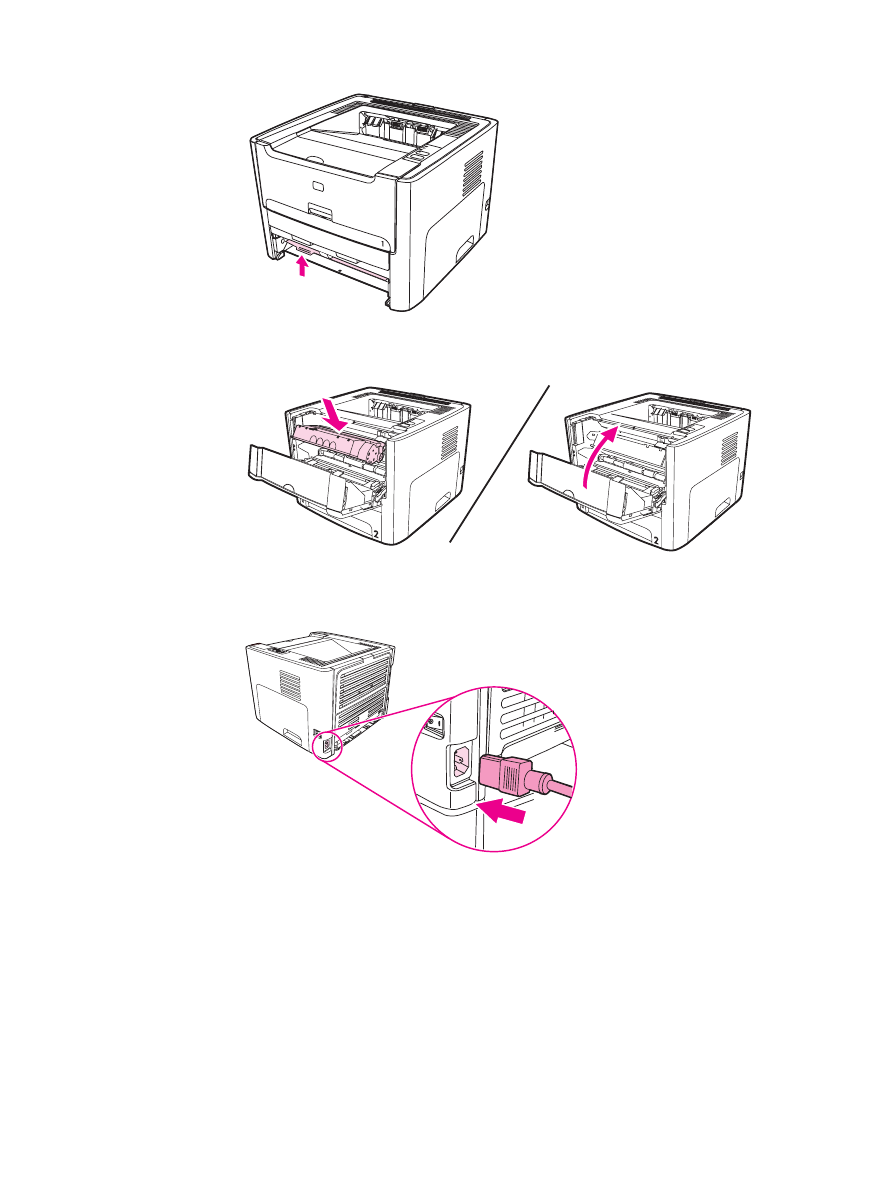
15. Close the front automatic two-sided path door.
16. Reinstall the print cartridge, and close the print cartridge door.
17. Plug the printer in to turn it back on.
78
Chapter 5 Maintenance
ENWW